It’s essential to take high-quality product photographs for apparel stores. For many customers, only a great product description is not enough - images will determine whether or not they buy your products.
But how to take high-quality, attractive pictures of clothes for your store?
If you have an eye for clothing photography and a modest budget, keep reading. This detailed guide will walk you through helpful tips to keep in mind during your shoot.
Let’s explore!
Before you start…
… you should prepare all necessary clothing photography equipment. The equipment you use in your shoot heavily depends on your budget. It doesn’t need to break the bank or be expensive. Some digital cameras are coming down in price, and many smartphone cameras are getting better and better.
Below is some photography equipment you’ll need:
Camera
Having the right camera can make the difference between a professional and an amateur-looking photo. Mirrorless is by far the best camera type to photograph clothing thanks to their newer technology, lighter weight, and better studio lighting connectivity when compared to traditional DSLR cameras.
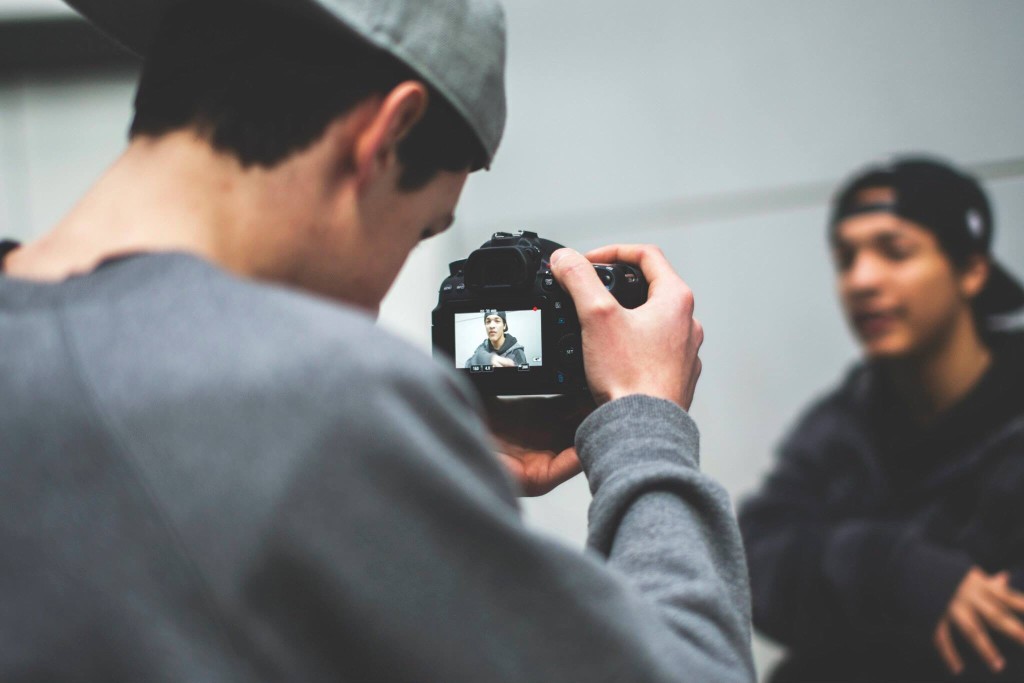
However, as we said above, you don’t need the most expensive camera to take pictures of your clothes. You can manage shoots with a smartphone also. We’ll talk more about that later.
Lighting source
Lighting is essential for clothing photography. Customers want to see all the product details, so it’s critical to obtain lights. If you have a room with natural light from windows, you can shoot there. If not, you will need artificial lighting, like a softbox.
(Note: You can find many artificial lighting products on Amazon).
You can start with a light kit, which contains three lights, to implement a three-point lighting setup. This kit includes one key light, one fill light, and a back/hair light.
Tripod
A tripod eliminates any unwanted camera shake caused by hand during your shoots. Attach your camera/smartphone to the tripod, frame your product, and take photos. Remember that tripods are not one-size-fits-all, so find one that is compatible with your camera.
Foam boards
Whether you are shooting with artificial or window light, there is always a shadow side of the product. You can place a white foam board in order to reflect light back into the shadow and brighten it up.
Backdrop
You can buy paper sweeps, which are huge rolls of white paper, to shoot a lot of products at once. They can be used to create white backgrounds to photograph your clothing on. If the sweep gets dirty, you can easily cut the dirty piece and then roll out a new clean one.
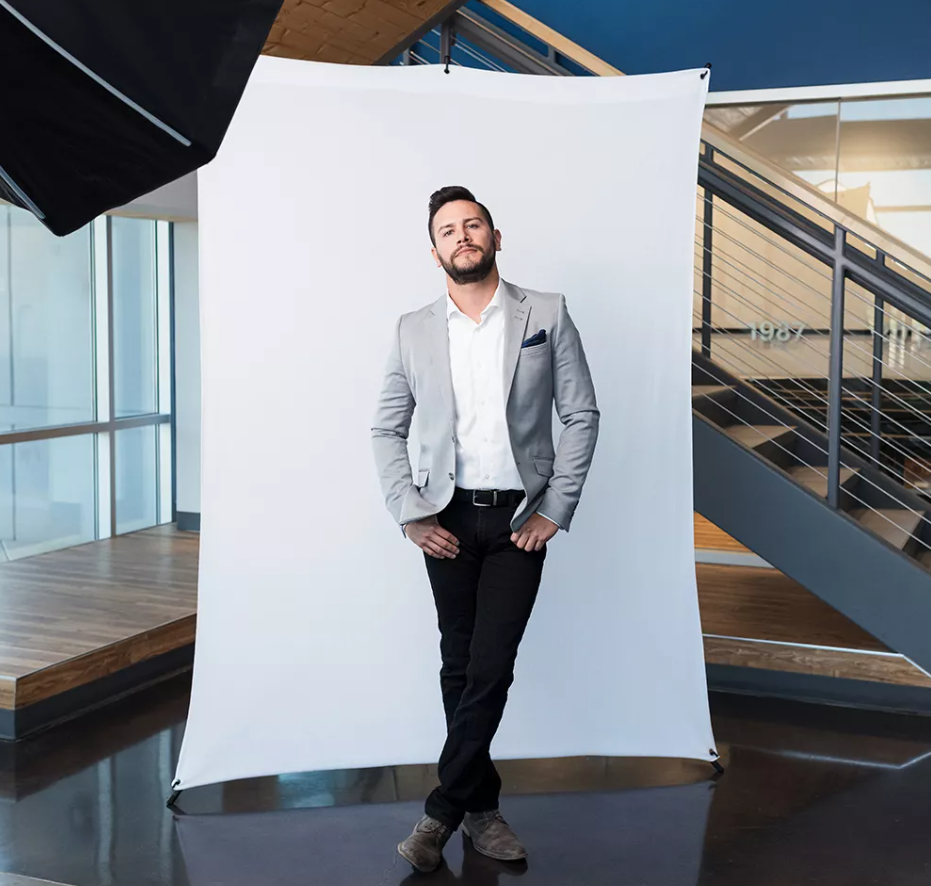
An alternative to white sweeps is a plain white photography backdrop, which should be approximately 10 x 20 feet. This will let you photograph a mannequin at full length for any longer dresses or garments.
Don’t have a mannequin? We’ll help you deal with that later.
Take pictures of clothes to sell online
Prepare your clothing
Unfortunately, clothing can become creased, wrinkled, and begin to look worn from storage and transport. That’s why it’s essential to prepare your clothing products before shooting.
Many sellers skip this step and think they can use Photoshop or any photo editing software to fix wrinkles, stains, and visible defects. However, don’t do that. You should try to capture your clothing in a state as close to perfect as possible, then use Photoshop only to add color correction and final touches.
You should pay attention to these things when preparing your clothing:
- Check all the buttons
- Make sure that all tassels or ties are styled neatly and consistently
- Ensure your sleeves are folded neatly and consistently
- Ensure there are no stains on the clothing
- Remove any unnecessary tags, stickers, or other types of identifying materials
- Iron or team all of your clothes and hang them up
- Repair damages and remove distractions (e.g., use tape or lint rollers to remove dust and strings)
Set up your photography studio
With several items, you can turn nearly any room with space into a photography studio. Make sure to clean all clutter from your area. You will want a clean space to stay organized and do the best work.
First, set up your backdrop. It’s recommended that you use a white or light gray backdrop in order to prevent distractions while capturing colors as accurately as possible. Position your product on a model on a mannequin or model in the middle of the backdrop as well as directly in front of your camera.
Once you’ve done that, start setting up your lighting and camera. As we mentioned previously, you can try a three-point lighting setup.
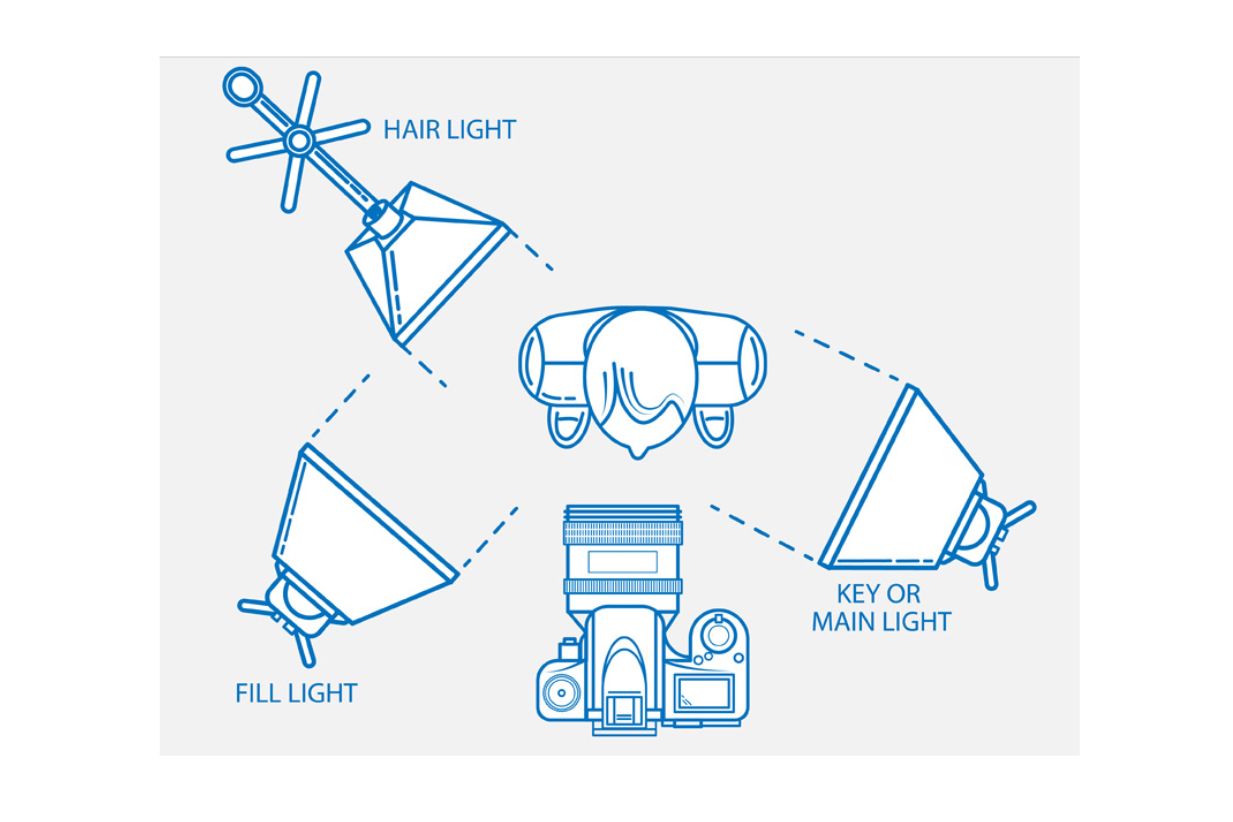
To start with, set up your first light (the key light) next to your camera and direct it towards the mannequin.
The second light (the fill light) should be positioned at a 45-degree angle from the mannequin and further away from the first light.
Finally is the hair light, which is between the mannequin and the backdrop.
The image above is a good guide on how best to position your camera, tripod, and lighting in comparison to the position of your mannequin or model.
Check your camera settings
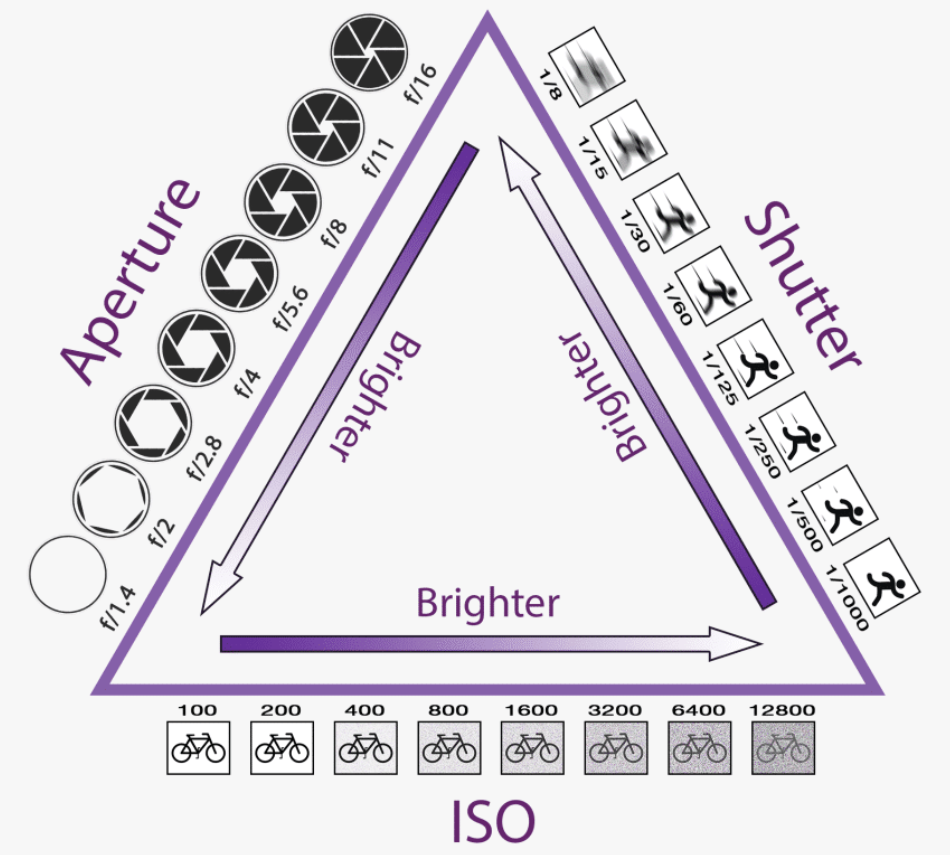
If your camera settings are wrong, it’ll be hard to make your images look professional (even if you’re a master at Photoshop!). Make sure you understand ISO, aperture, shutter speed, and white balance before photographing your products.
ISO
When taking photos of clothing, the ideal ISO setting is no greater than 600-640. Higher ISOs often produce distracting “noise” or “grain,” which is colored or grayish speckles that make your photographs more filmic. At higher ISOs, the camera cannot capture as much sharpness, so some details begin to look soft. With a tripod, you’ll keep your ISO at 100 or 200 for optimal sharpness and clarity.
Aperture
Represented by the f-number (e.g., f-16, f-2.8), the aperture helps control focus. In general, the larger the aperture number, the more aspects of your image will be in full focus. Ensure that you set the aperture higher than f-11, as this allows for all aspects of your products to be in complete focus.
Shutter speed
Shutter speed determines how long your shutter will remain open. Ideally, you should set it around 1/125 when taking pictures of clothes.
White balance
If you’ve ever looked at a photo that seemed like it was taken through an orange or blue filter, the white balance was probably off. The white balance setting controls how the camera interprets the colors recorded.
You can set your white balance specifically based on the type of light source you are using, or set the white balance to Auto, then let the camera decide. Whatever you choose, remember the white balance. Otherwise, you may find yourself hard-pressed to try and recreate accurate colors in Photoshop.
Start taking product photos
Now comes the most interesting part - photographing your clothes!
Remember these things when taking your product photos:
- Use a tripod to make your camera stable. If you don’t have a tripod, place your camera on any stable or hard surface.
- Your model or mannequin should be at the center of your camera frame. If you need closer shots, adjust the tripod or the optical zoom of your camera.
- Direct your camera at your model or mannequin, press halfway down on the shutter release button, allow the camera to focus on your model/mannequin and snap the shot.
- Shoot as many images as possible. Try the front and back, left and right sides, 45-degree angles, and any details. Test several close-up shots to highlight any special details. Customers will trust their impressions if the product is backed up by multiple photographs from multiple angles.
Edit your product photos
Once you’re done taking product photos, it’s time to edit your images to make them look great on your online store.
Make sure that you handle the alignment, cropping, background, and color to keep consistency.
- Alignment. Ensure that your products are all the same size and are centered within each image. All of the angles, edges, and corners of your products should line up in relation to one another. The easiest way is to create guidelines in a Photoshop template.
- Cropping. You should crop your images identically, so customers have a seamless online shopping experience. If you use guidelines for alignment, then consistently cropping and sizing images according to your store’s image specifications should be no problem.
- Background. A white background is required by some marketplaces. You can also remove the background to get more flexibility in web design and modestly decrease your file size.
- Color. Inaccurate representations of colors can leave shoppers dissatisfied and frustrated, so ensure that your colors are accurate. Some colors, such as reds, pinks, and neons, are quite difficult to correctly photograph in-camera, even with careful attention to white balance. In this case, you need to tweak them in Photoshop. After that, remember to convert your images into SRGB format, so different computer screens, browsers, and websites won’t change the accurate colors.
Take pictures of clothes to sell without a mannequin
It’s necessary to decide how you’d like your clothing items displayed on your online store. Without a mannequin, you still have other ways to photograph clothing.
Flat lay
This is the easiest and one of the most cost-effective ways to take pictures of your clothes. It refers to arranging clothes on a flat surface and taking a photo from above. It is also called bird’s-eye view. It’s a great alternative to mannequins and can help you create beautiful product photos that sell.
Flat lay photography is used a lot for social media. However, you can use it for your web content as well.
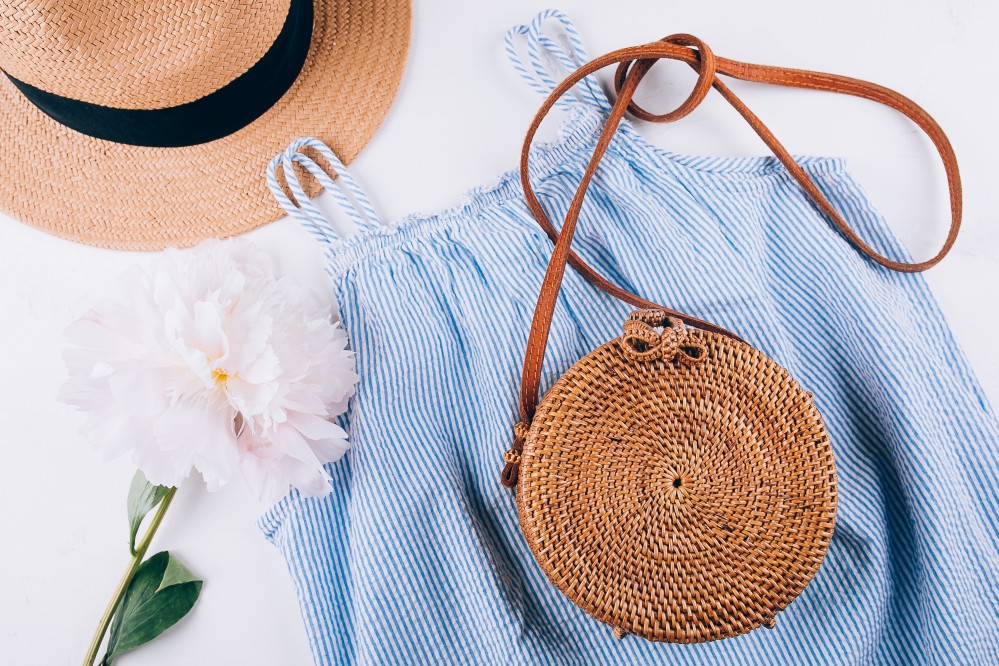
This technique works well for:
- T-shirts
- Sports pants
- Sweaters
- Blue jeans
- Socks
- Beanies
More complicated apparel, such as outdoor or sports gear, may require a mannequin or model to show the fit. You should test flat lay with your products to see how it works.
Hanger
Another simple technique is to put your clothes on hangers to photograph. It is used to show products at eye level and involves hanging clothes on a hook against a white background or wall, then taking a photo.
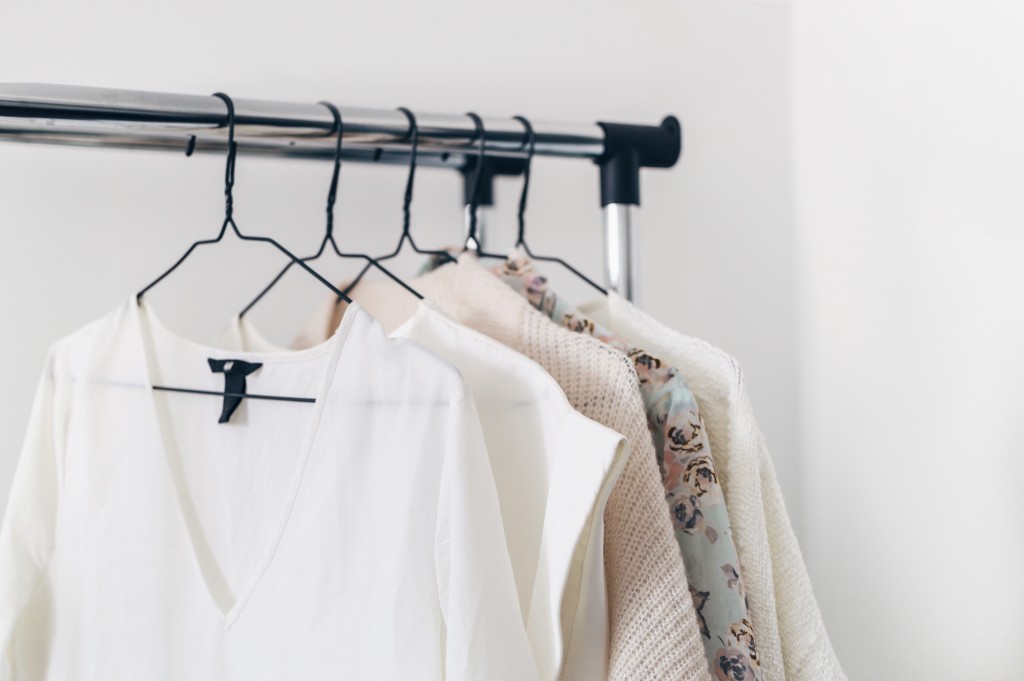
This option works best for pieces made of lightweight materials, like silk. Once the clothing is prepared, it will not wrinkle.
Model
If you have the budget, consider hiring a model.
Models can strike any kind of pose with any kind of angle that flatters your clothing. This helps you create the perfect in-context shot of your clothing, which can be used on your online store and also on social media.
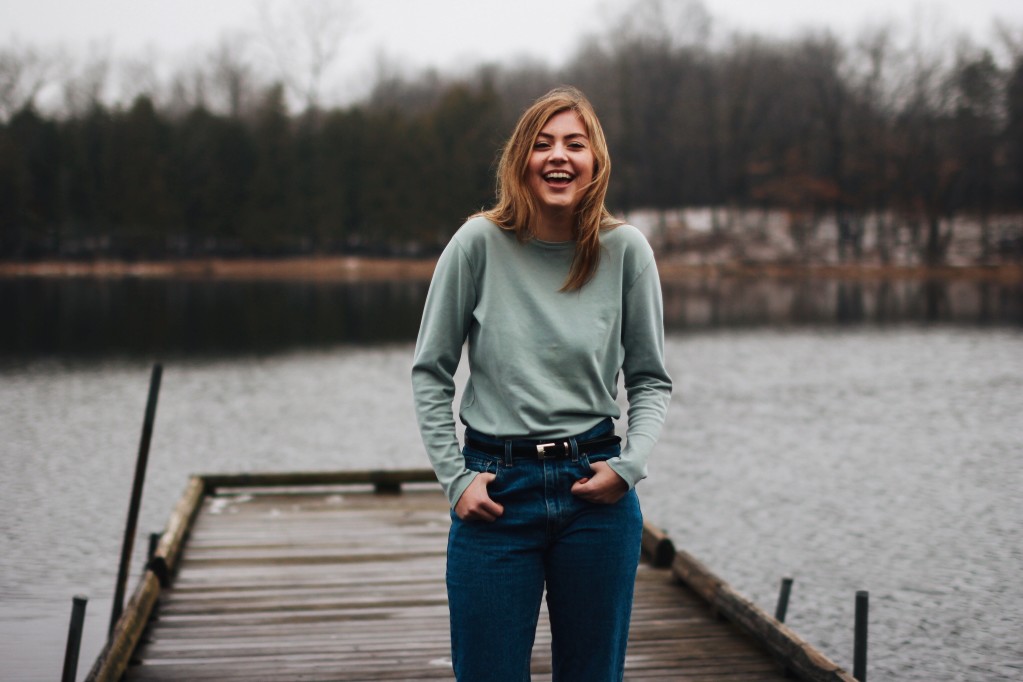
Besides, models give your clothing personality and create more of a brand. Many brands choose models who they think represent their target customers. For example, if you compare Zara and Arnhem, the clothes, the models, and the vibes couldn’t be more different.
Take pictures of clothes at home with iPhone
When mentioning clothing photography, you may not think of your iPhone as the best camera option. However, the truth is that with a versatile, high-quality camera, your iPhone is perfect for fashion shoots.
Below are our best tips for using your iPhone for clothing photography.
Try different camera angles
Make your clothing pictures look more engaging by experimenting with different angles. Besides typical eye-level images, you can also incorporate high-angle and low-angle shots.
You can even generate a drone-like angle shot photo with a selfie stick. For a higher reach, try holding your arm up and taking a picture with the selfie stick’s remote or activating your iPhone’s self-timer.
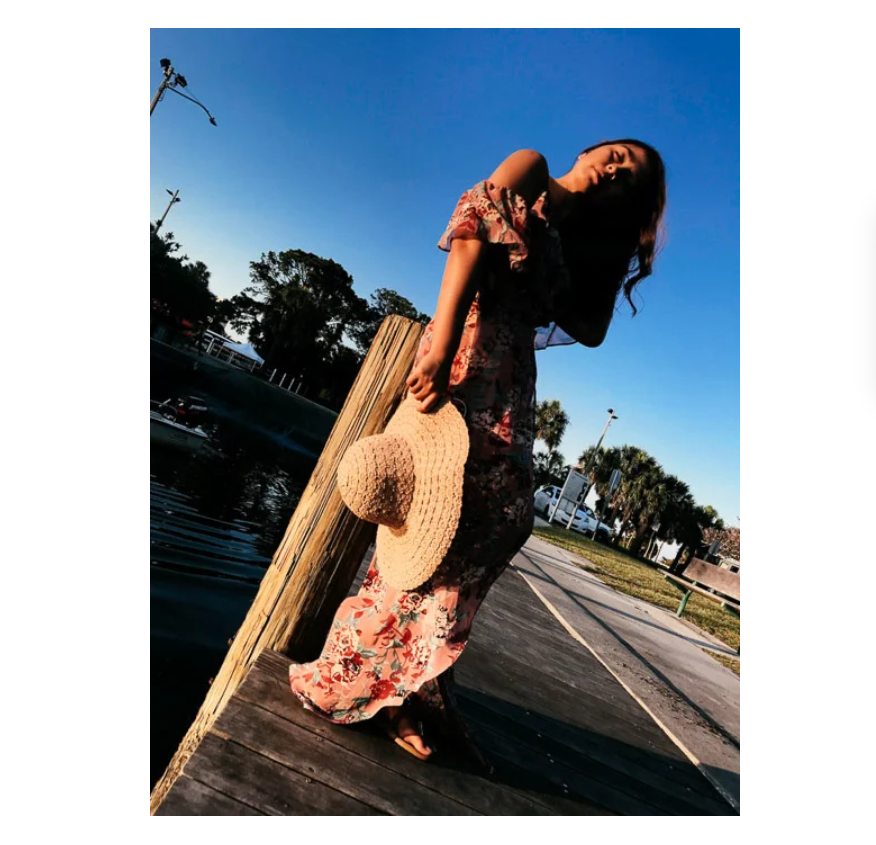
Another creative angle you should try is the Dutch tilt. All you need to do is to tip your iPhone slightly to the left or right and take photos. As it is an uncommon way of framing your subject, it looks more artistic, and people tend to pay more attention to it.
Create movement in your photos
Capturing clothing photos is fun because the fabric can drape, flow, and rustle when your model moves. By capturing that movement, you’ll make the viewer feel like they’re part of the scene.
Start by asking your model to move slowly and purposely based on how the clothes they’re wearing make them feel. Flowing, long dresses and skirts can show more movement than a pair of skinny jeans. However, the goal is to capture the clothing in action. Besides, you can add a bit of a breeze with a small fan to make your model’s clothing and hair move naturally.
Apply the rule of thirds
This old photography trick has been around for years, but you can still apply it to your iPhone. The rule of thirds suggests that your image is split into nine equal blocks that form a three-by-three grid. Aim to get the most interesting parts of your photo near the corners of these segments, where the imaginary gridlines meet.
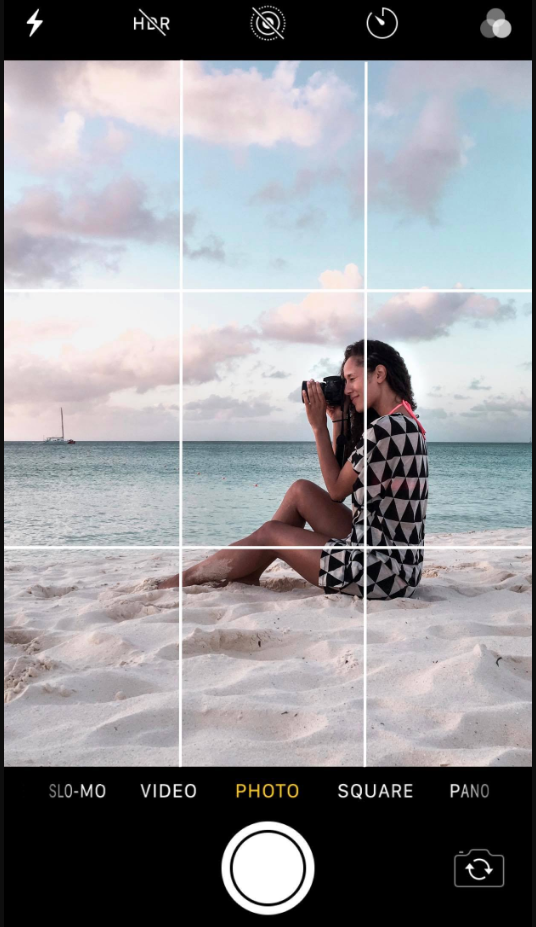
Below is how to turn on the grid option on your iPhone:
- Open Settings
- Scroll down and tap Camera
- Under Composition, choose the Grid option
Make your iPhone more ergonomic
iPhones may have highly capable cameras, but they are still not quite ergonomic. To keep your iPhone stable while taking pictures of clothes, you need to make it easier to hold.
The easiest solution is to install a pop-up holder behind your iPhone. That way, you don’t need to hold it awkwardly while taking clothing photography. You can also buy a tripod holder and then attach a mini-tripod (or even a selfie stick) to it. The tripod works as a handle to help you securely hold it. For specific shots, you can set it up and place your iPhone on a flat surface for added stability.
Having a more ergonomic iPhone set-up will help when you have to take a bunch of photos. In addition to keeping your phone stable, your fingers and wrists won’t get as tired.
Use AE/AF lock
In many ways, what makes iPhone photography easy and quick is its ability to change the focus and exposure by itself, so you don’t have to.
But autofocus does not always get everything right. It sometimes focuses on the wrong parts of the frame, and you end up with a blurry image. To avoid this, tap on your point of interest to make sure they are sharp. Hold it for about 2-3 seconds until you enable the AE/AF lock (for auto focus and exposure).
When you’re doing a fashion photo shoot with your iPhone, picking the focus area should be your standard procedure. If you fail to do so, your photos may or may not be in focus.
Try Portrait mode
One of the greatest developments in iPhone photography is that now you can blur the background just like a DSLR. This feature is helpful, especially when you have plenty of distracting elements behind your clothes.
Recently, only smartphones with dual cameras can achieve background blur. Simply put, the two cameras take photos simultaneously and then combine them into one image. Next, your device develops a “depth map” separating the foreground from the background and applies the blur subsequently.

To apply background blur for your iPhone photos (7 Plus or newer), you just need to switch to Portrait Mode. Tap to focus on your subject. Once the depth effect marks turn yellow, start shooting. You can also see the blur in real-time, so you don’t need to guess how your images would appear.
Avoid zooming in
When you take an image from a distance, it is tempting to zoom in on something specific you are trying to capture. However, it is actually better not to zoom in. Doing so can make your photo appear blurry, grainy, or pixelated.
Instead, try to get closer to your subject or take the image from a default distance and crop it later on. That way, you will not compromise quality, and it is easier to play around or optimize a larger image.
Install a third-party camera app
If you have never ventured beyond your iPhone’s default camera app, you might be surprised at the number of third-party alternatives out there. They give you access to different features, extra settings, and bundles of filters to get your clothing photos looking their best.
For example, Manual lets you control shutter speed, white balance, ISO, and more. Or, Afterlight gives you access to a set of pro tools, together with a bunch of impressive filters.
Speaking of filters, Instagram is not just a social network. It can turn your shoddy pictures into works of art with a couple of taps. Instagram now includes a number of editing and tweaking tools besides the filters it is famous for, making it one of the most excellent photo-taking apps you can get.
Take pictures of clothes for Poshmark
Poshmark calls itself the largest social online commerce website where users can sell and buy fashion items like clothing, shoes, and accessories. It boasts more than 25 million items uploaded via smartphones and 5000 brands for sale on the site and app.
Just simply download the Poshmark app - it is free and available for iPhone and Android. Next, snap some photos of your clothes. Then, fill in your item description with as many details as you can. Finally, add the price, click “Done,” and your items are officially listed.
Quite easy, right?
However, to make your clothing photography stand out from the crowd, you should know the following Poshmark picture-taking tips.
Understand types of photos in a Poshmark listing
There are two types of photos in a Poshmark listing:
- Covershot is the first photo in a Poshmark listing and serves as the very first impression of the item you’re selling. And like any first impression, you’ll want to make your item stand out to potential customers and entice them to click and buy.
- Detail photos are all the other photos in your listing. You can add up to 8 photos. Represent your item from different angles - the front, the back, laid full out. You should also add photos of any possible stains, rips, signs of wear, or tags so that the customer can sell the overall condition.
Pay attention to the size
Poshmark clothing pictures should be in a square format (1:1 ratio). If you’re taking pictures with your phone, you just need to take them in the square format. Otherwise, you’ll risk your items getting cropped and looking askew.
Have a photo checklist
Make your job easier by having a checklist when photographing:
- Full shot of the clothing
- Closer up, more detailed shot
- All angles of the item
- The brand label tag and fabric content tag
- Any and all flaws
- If you want to be extra, take photos of areas that commonly show wear, such as the armpits and crotch areas, to prove they are in excellent condition.
Optimize your images (and increase SEO)
It’s vital to optimize images, as it can decide the result of your rankings. All the rules and requirements for better rankings may not be obvious, so we collected some here:
- Name your images correctly, and provide alt tags that are different from the image description and caption.
- Use high-quality images. Preferably in JPEG, as they offer the smallest size for high-quality images. The PNG is only appropriate for simple images with little detail - as it offers the smallest size where quality is not important. GIFs are too heavy and only used for smaller formats.
- Reduce your image size to improve the loading speed. Some services to reduce your image size include TinyPNG, Shortpixel, and Optimizilla.
Try free photo editors for your Poshmark pics
The good news is that there are many free online photo editing tools to help you strike a balance between a carefully edited photo and one that remains true to life.
And you don’t need extensive graphic design experience to use these tools. With these tools, the learning curve is almost zero. Some free online photo editors that can help your Poshmark offerings look professional include:
- Canva
- Photoscape X
- Fotor
- Pixlr X
- PicMonkey


